The Ultimate Biscoff Brownies Recipe (So Easy!)
“Indulge in rich Biscoff brownies made with cookie butter and chocolate chips. Just 10 ingredients, ready in under an hour for a perfect dessert treat.”
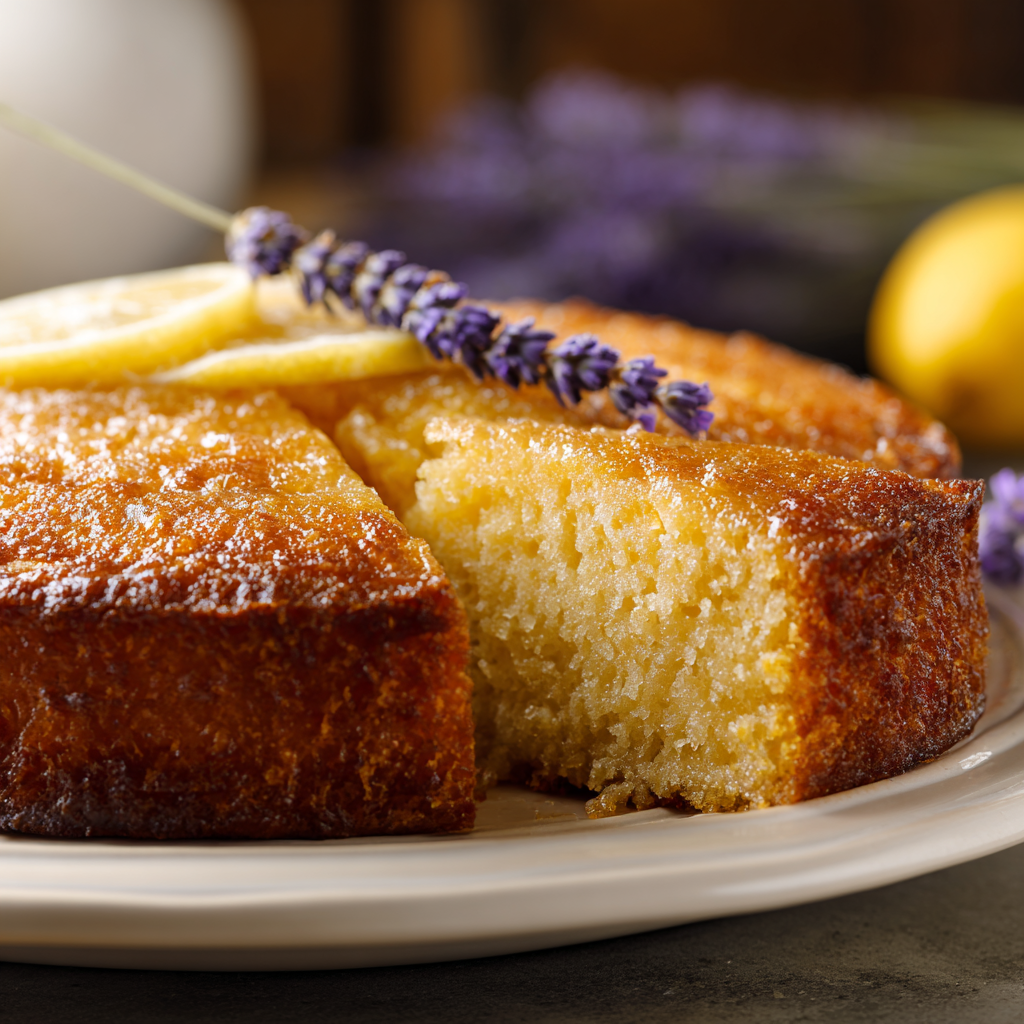
One rainy afternoon, I had a craving for something sweet and decadent. That’s when I whipped up these Biscoff brownies, and oh my goodness, the rich aroma filled my kitchen, instantly lifting my spirits. The combination of buttery brownie texture with the spiced notes of Biscoff was a revelation I didn’t expect.
What sets this Biscoff brownies recipe apart is the swirl of creamy Biscoff spread on top, creating an irresistible layer that takes each bite to a whole new level. You won’t find a simpler or more delicious way to indulge your sweet tooth!
Why This Recipe Works
Ingredients
What You'll Need
- 3/4 cup Biscoff cookie butterthe highlight; it adds a rich, spiced flavor and chewy texture
- 1/2 cup light or dark brown sugardark brown sugar gives a deeper, molasses-like flavor while light brown sugar adds a subtle sweetness
- 1/2 cup granulated sugarfor sweetness and to create that lovely crust on top
- 2 large eggsthese help bind the ingredients and add moisture
- 1 large egg yolkextra richness and a fudgier texture; don’t skip this!
- 1 tablespoon vanilla extractbrings out all the flavors and adds warmth
- 10 tablespoons unsalted butterfor richness and depth; make sure it’s at room temperature for easy mixing
- 2/3 cup + 1/4 cup semi-sweet chocolate chipsthese add melty pockets of chocolate; use high-quality chips for the best results
- 1/4 cup unsweetened Dutch cocoa powderprovides a deep chocolate flavor that balances the sweetness
- 2/3 cup + 1 tablespoon all-purpose flourmeasuring correctly is key; too much flour leads to dry brownies
- 1 teaspoon espresso powderintensifies the chocolate flavor without adding coffee taste
- 1/2 teaspoon fine sea saltenhances all the flavors and balances the sweetness
- 4-5 Biscoff cookiesfor a crunchy topping that adds texture and visual appeal
- Extra cookie butterdrizzled on top for an extra layer of flavor and indulgence
When you pick up your ingredients, opt for a creamy Biscoff cookie butter that’s easy to spread. Using high-quality chocolate chips will make a noticeable difference in the final flavor of these Biscoff brownies. Don’t forget to check your cocoa powder; Dutch-processed will give you the best results!
Easy Substitutions
- Dairy-free: swap unsalted butter for coconut oil — you’ll get a subtle coconut flavor, and the texture will remain moist.
- Gluten-free: swap all-purpose flour for almond flour — this will create a denser brownie, but the nutty flavor complements the Biscoff nicely.
- Egg-free: swap eggs for 1/4 cup unsweetened applesauce — the result will be softer and less cake-like, but still delicious.
- Lower calorie: use a sugar substitute for both sugars — it may alter the texture slightly, but you’ll save on calories.

How to Make This Recipe
Prep & Mix
Press a large piece of parchment paper into an 8×8 baking pan, creasing the edges. This helps guide you when pouring the cookie butter and makes for easy removal later.
Spread the Biscoff cookie butter evenly inside the creased edges, then chill it in the freezer until firm—about 30 minutes. A firm layer ensures it holds up against the brownie batter.
Preheat the oven to 350°F (180°C) while you whisk together the sugars, eggs, and vanilla extract until well combined. This mixture should look smooth and slightly frothy, which helps aerate the brownies.
Melt the butter and chocolate chips together until smooth, then whisk in the cocoa powder. You want a glossy mixture that smells rich and chocolatey.
Fold in the flour, espresso powder, and salt until just combined. Be gentle here; overmixing can lead to tough brownies, which is definitely not what we want!
Assemble & Bake
Pour half of the brownie batter into the pan, spreading it evenly to the edges. It should look thick and luscious—this base holds the cookie butter filling.
Place the frozen cookie butter square on top, peeling off the parchment paper. Pour the remaining batter over it, spreading it to cover completely. This layering creates that delightful surprise of cookie butter.
Press broken Biscoff cookies on top and drizzle with warm cookie butter. Bake for 30-40 minutes, until a toothpick inserted comes out with a few moist crumbs. The aroma will be heavenly!
Allow the brownies to cool completely on a wire rack. Before cutting, feel free to drizzle more cookie butter on top for an extra indulgent touch. Enjoy your delicious Biscoff brownies!
Tips & Tricks
The Importance of Chilling the Cookie Butter
Chilling the Biscoff cookie butter is a great choice for these brownies. When you spread it into the pan, it should be firm enough to hold its shape but still soft enough to mix with the brownie batter. I usually pop it in the freezer for about 30 minutes. This step prevents the cookie butter from melting into the batter too quickly, which can lead to a less distinct flavor in your brownies.
Measuring Flour Accurately
Getting the flour measurement right is crucial for the perfect brownie texture. I always spoon flour into my measuring cup instead of scooping it directly, which packs it down and leads to dry brownies. Just use a spoon to fluff it up first, then gently scoop it into the cup and level it off with a knife. This little trick makes a world of difference, ensuring your Biscoff brownies come out fudgy and moist every time.
Pro Tips
The better the chocolate, the richer your Biscoff brownies will taste. I always opt for a bar of 60% to 70% dark chocolate for a deep, complex flavor that balances perfectly with the sweetness of the cookie butter.
Sifting the flour and cocoa powder not only removes lumps but also aerates the ingredients, giving your brownies a lighter texture. I learned the hard way—my first batch was dense because I skipped this step!
Letting the brownies cool completely in the pan helps them set up nicely, making them easier to cut. I usually leave them for at least an hour, which also allows the flavors to deepen—so worth the wait.
Feel free to mix in chopped nuts, chocolate chunks, or even a swirl of peanut butter for an extra kick. Just remember to keep the ratios balanced; too many add-ins can affect the brownie structure.
Variations & Customizations
Flavor Twists
Peanut Butter Swirl
Incorporate 1/2 cup creamy peanut butter into the brownie batter before baking. The result is a rich, nutty flavor that pairs beautifully with the Biscoff, creating a delightful swirl of contrasting textures. The brownies become slightly denser, with a fudgy interior that's just irresistible.
Maple Pecan
Mix in 1/2 cup chopped pecans and replace the granulated sugar with 1/2 cup pure maple syrup. These brownies take on a warm, comforting aroma with a slightly chewy bite from the pecans. The maple syrup adds a unique sweetness that balances perfectly with the Biscoff cookie butter.
Unexpected Creative
Spicy Biscoff
Add 1 teaspoon of ground cinnamon and 1/4 teaspoon cayenne pepper to the dry ingredients. This unexpected kick transforms each bite into a appealing experience, with the warmth of spices contrasting beautifully against the sweetness of the chocolate. The brownies come out with a deeper flavor profile, making them a fun twist for adventurous eaters!
Storage & Meal Prep
How to Store
Room Temperature
Your Biscoff brownies will stay fresh for about 3 days at room temperature. Just make sure to store them in an airtight container to keep their fudgy texture intact. I love using a glass container with a tight lid — it really helps maintain the moisture.
Refrigerator
If you want to keep them longer, pop them in the refrigerator for up to a week. Let the brownies cool completely before wrapping them individually in plastic wrap to prevent drying out. Place them in an airtight container to keep that lovely Biscoff flavor alive!
Freezer
For longer storage, freeze your brownies for up to 3 months. I recommend flash freezing them on a sheet pan first, then wrapping each brownie individually in plastic wrap and placing them in a freezer bag. When you’re ready to enjoy, just thaw them overnight in the fridge.
Meal Prep
I suggest doubling the recipe to always have some Biscoff brownies on hand. They’re perfect for a sweet treat during the week. Prep them on a weekend, and they’ll stay fresh for up to a week in the fridge. To reheat, pop them in the microwave for about 15-20 seconds for that fresh-out-of-the-oven feel.
Equipment You'll Need
Essential
Baking pan (8x8 metal)
A sturdy metal baking pan ensures even heat distribution, giving you that perfect brownie texture. Glass pans can work, but they tend to cook unevenly, which could lead to a gooey center or overly crispy edges.
Parchment paper
This isn’t just for easy removal; lining your pan with parchment helps to prevent sticking and keeps the brownies from getting too greasy. It also allows for a cleaner cut when you slice them up!
Nice to Have
Stand mixer or hand mixer
While you can whisk by hand, a mixer saves time and effort when combining the egg and sugar mixture. A stand mixer gives you a consistent texture without the arm workout, which I love! But a hand mixer works just as well for this recipe.
Frequently Asked Questions
Can I use a different type of cookie butter?
Yes, you can use other cookie butters like Speculoos or any spiced cookie spread. Just keep in mind that the flavor profile may change slightly, but it will still be delicious!
Why did my Biscoff brownies come out dry?
Dry brownies can result from overbaking or using too much flour. Always measure your ingredients carefully and keep an eye on them toward the end of the baking time.
Can I make these brownies gluten-free?
Absolutely! Just substitute all-purpose flour with a gluten-free blend. Make sure the blend you choose is suitable for baking to achieve the best texture.
How can I add more chocolate flavor?
For a richer chocolate taste, consider adding chocolate chips or chunks into the batter. You can also drizzle some melted chocolate on top once the brownies have cooled.
What should I serve with Biscoff brownies?
These brownies pair wonderfully with a scoop of vanilla ice cream or a dollop of whipped cream. A sprinkle of sea salt on top can also enhance the flavors beautifully!
These Biscoff brownies are a delicious way to indulge your sweet tooth, combining rich chocolate with that unique caramelized flavor we all love. For an extra touch, sprinkle some sea salt on top before baking to enhance the taste. I can’t wait to hear how yours turn out, so be sure to leave a comment or share your creations with me on Pinterest!

Biscoff Brownies
Indulge in these rich and gooey Biscoff brownies, packed with cookie butter and chocolate for the ultimate treat!
checklist Ingredients
- 3/4 cup Biscoff cookie butter
- 1/2 cup light or dark brown sugar
- 1/2 cup granulated sugar
- 2 large eggs
- 1 large egg yolk
- 1 tablespoon vanilla extract
- 10 tablespoons unsalted butter
- 2/3 cup semi-sweet chocolate chips
- 1/4 cup unsweetened Dutch cocoa powder
- 2/3 cup all-purpose flour
- 1 teaspoon espresso powder
- 1/2 teaspoon fine sea salt
- 4-5 pieces Biscoff cookies
- Extra cookie butter for the top
menu_book Instructions
- 1
Press a large piece of parchment paper into an 8×8 baking pan and chill it in the freezer until firm.
- 2
Preheat the oven to 350°F (180°C) and line the baking pan with parchment paper.
- 3
Whisk together the brown sugar, granulated sugar, eggs, and vanilla extract until well combined.
- 4
Melt the butter and chocolate chips together until smooth, then whisk in the cocoa powder.
- 5
Whisk the melted chocolate mixture into the egg mixture until just combined.
- 6
Fold in the flour, espresso powder, and salt until just combined.
- 7
Pour half of the brownie batter into the pan and spread it to the edges.
- 8
Place the frozen cookie butter square on top of the batter and pour the rest of the batter on top.
- 9
Break up the Biscoff cookies into pieces and press them on top of the batter.
- 10
Warm 2 tablespoons of cookie butter in the microwave for 15-20 seconds and drizzle it over the top.
- 11
Bake the brownies for 30-40 minutes or until a toothpick comes out with a few moist crumbs.
- 12
Drizzle more cookie butter on top before cutting and enjoy!
monitoring Nutrition Facts (per serving)
Ratings & Reviews
Readers love this recipe! Leave your own rating and review below.